
How to import servers
This article covers the different methods for uploading server data into the platform.
Contents
Reimporting / Reuploading server information
Manually adding in servers
The first method for getting server data into the platform is via filling out manually the details of a server into the platform. This can be done via the following page:
Portfolio (Tab) - Servers (Drop Down) - Server Inventory (Sidebar)
On this page select the 'New Server' button.
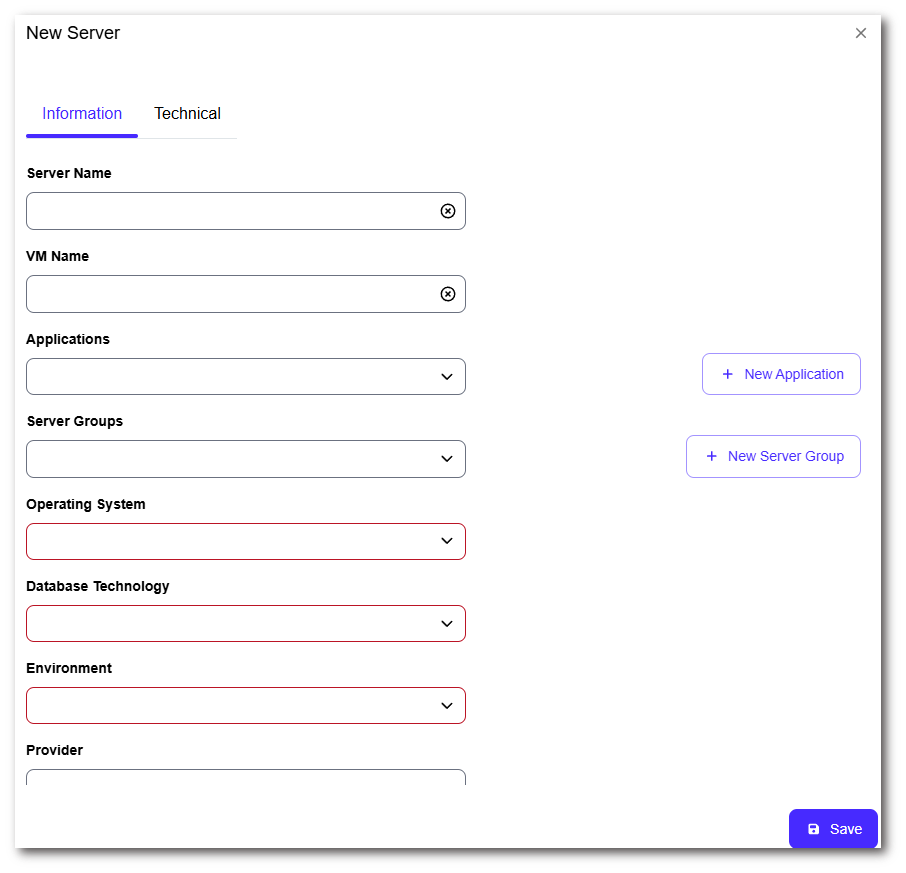
The essential data points that must be completed are as below. The other items are optional.
Server Name
Operating System
Data centre
Environment
Type
Click the 'Save' button on the bottom right of the pop-up.
This method of server data collection is only recommended for small-scale projects or adding in a minimal number of missing servers.
Importing servers via a XLSX
Server information can be imported via a XLSX file. This information can be exported from discovery tools such as Cloudamize, CloudScape or similar or from your infrastructure platforms using a tool like RVTools. Data can be uploaded directly from your XLSX file and the columns matched in the import screen, or you can amend your XLSX to have the correct columns headers. The Cloud Navigator XLSX template can also be populated, in the event you are using the template, please only use columns you intend to upload data with. Also please ensure the first 2 rows of these columns remains intact.
When using your own XLSX file ensure that RAM and Disk are calculated in GB not MB. In the event, your export is in MB convert this in Excel with formula or = CELL/1024.
Once the XLSX is ready import it via the 'Import Servers' button. This will present the following pop-up.
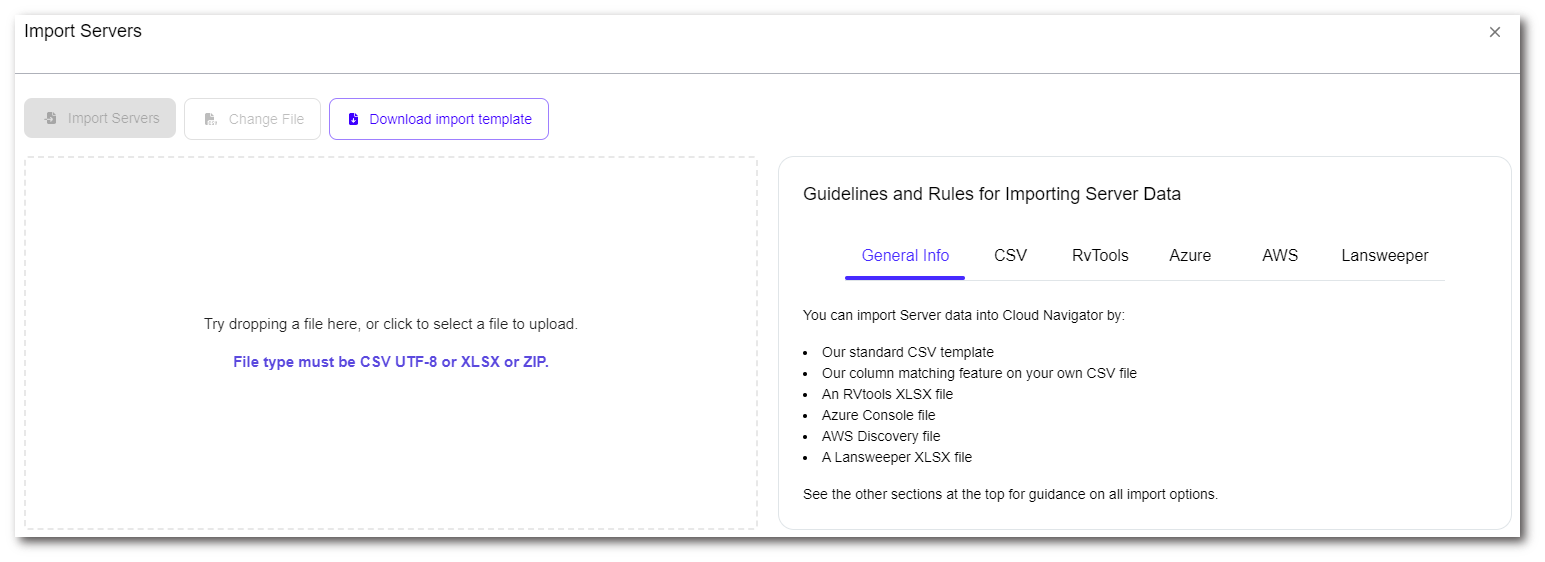
You can either drop the file in the specified box or alternatively click on this box and select the appropriate file from your computer. Once selected you will be taken to the next page, where you will need to match the column headers in the XLSX file to the appropriate field names in Cloud Navigator.
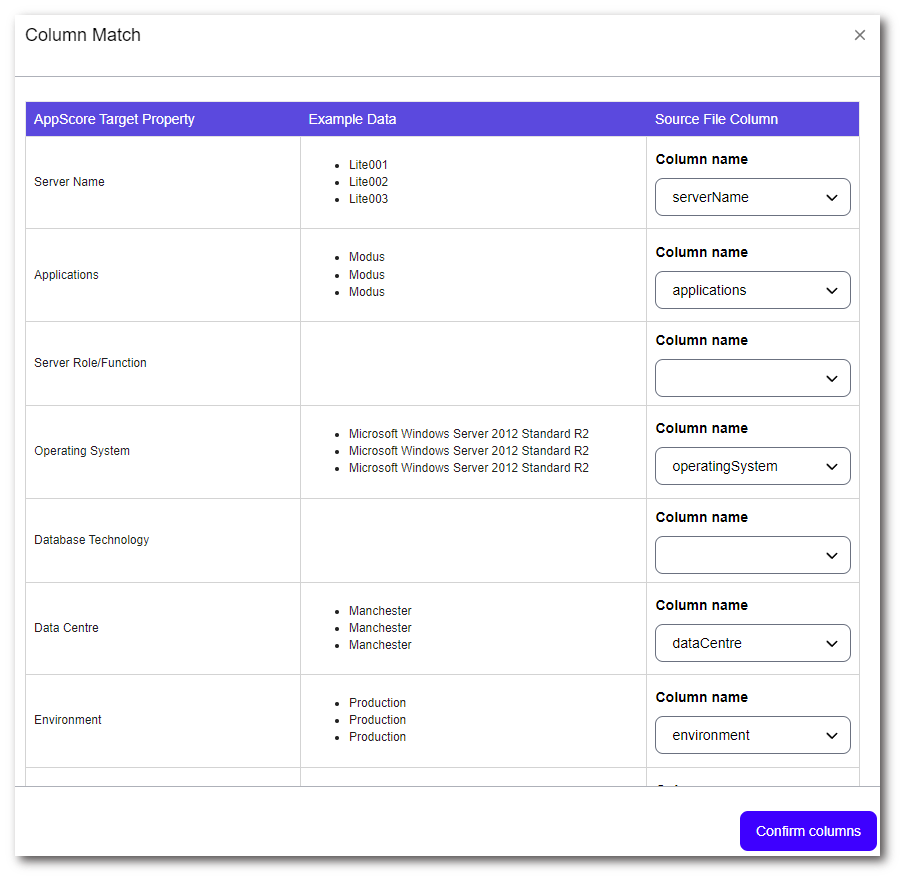
Once the fields have been matched correctly, select the 'Confirm Columns' button. On the next page choose 'Import Servers', this then runs through adding the servers to the platform. Once completed you will find the servers inventory filled with the servers uploaded.
You can import Server data into Cloud Navigator using an RVtools spreadsheet as well. For RVtools the file must be an XLSX RV Tools file. Cloud Navigator will automatically extract all the required data points to populate Cloud Navigator. See our RVtools guide.
We also have the ability to upload a XLSX from Azure and AWS. See our pre-requisites guide.
Importing servers via the API
In many cases you may have used a migration or discovery tool to capture server information, Cloud Navigator supports several providers allowing you to seamlessly load this information into the platform. You can do this via the following page:
Portfolio (Tab) - Servers (Drop Down) - Import Servers From API (Sidebar)
On this page you need to input the API information pertaining to the tool you are using, this can be done via the 'Open API Settings' button in the top left. Here you can add the details associated with the tool you want to import from.
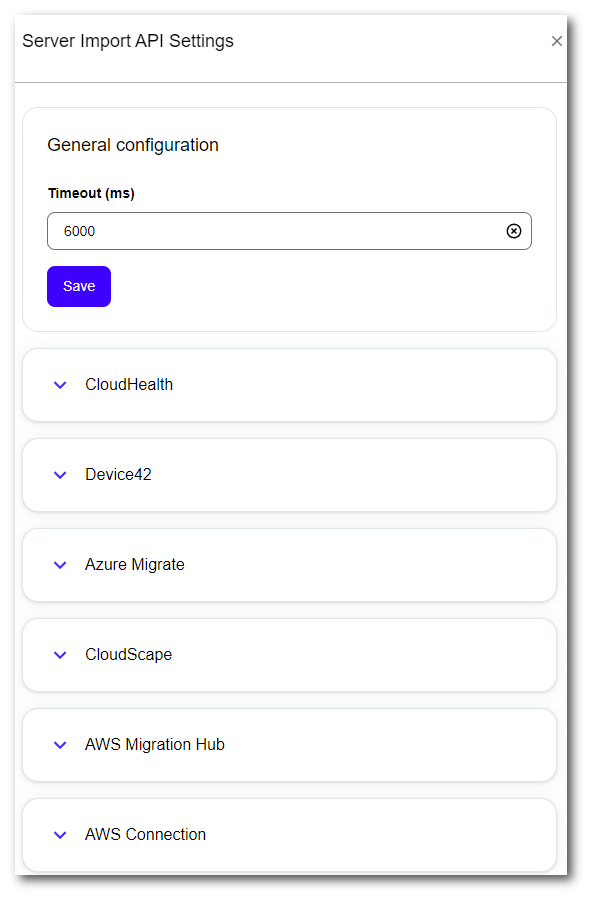
Once you have filled in the appropriate details, select the 'Save' button. This will take you back to the main Import From API screen. The API Service just added will now be listed. From here select the 'Import' button next to the service you want to use. Some APIs support additional parameters, if this is the case a pop-up will appear from where you can choose the import type.
We have a specific article for using Azure Migrate, see our guide on the Azure Migrate API. The Azure Migrate API import features a modal that takes you through each section to validify for the import.
Deleting servers
In some cases, you may want to delete servers that are added to the platform. This can be done via the following page:
Portfolio (Tab) - Servers (Drop Down) - Server Inventory (Sidebar)
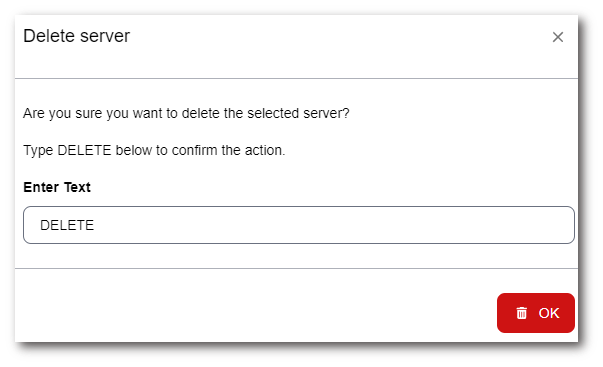
Select the servers you want to remove by ticking their boxes. You can apply filters to find groups of servers to delete. Select 'Delete' at the top, the confirmation popup will appear. This will then prompt you to type DELETE in caps and select the 'OK' button. Once completed the servers will be removed.
Reimporting / Reuploading server information
Cloud Navigator allows you to re-upload and refresh the data contained within the platform, this enables you to add information with a partial dataset as well as ensuring the data featured is up to date. This can be done by re-uploading a XLSX for example.
The platform matches based upon the 'Server Name', so please ensure this is present. Any new information you want imported should be entered in the appropriate columns in the XLSX file. We would recommend when reuploading with the template to only contain columns you are adding data to. Additional columns featuring blank data may overwrite data currently present.
This will function in a similar way when pulling from the API again. The match will be based upon the Server Name and any new information will be amended to the servers in the platform.
Common use cases for this method are to load initial server data from a XLSX file whilst a discovery tool is being deployed. Once performance metrics have been captured, the data can be refreshed in Cloud Navigator via an API to the discovery tool. Or, data could be loaded via API or XLSX from the discovery tool and then enriched with information such as environments, application names etc. using a XLSX file provided by the infrastructure, application or support teams.
To contact Cloud Navigator sales or support for any reason at all, simply email cloudnavigator-support.gb@softwareone.com and one of the team will get back to you. If your issue is urgent, please mark the email as URGENT in the subject line.