Creating applications
This article takes you through the process of creating Applications in Cloud Navigator.
Contents
Manually adding in applications
Importing applications via a CSV
Importing applications via a server CSV
Manually adding in applications
Applications can easily be created manually on the platform, this can be done via the following page:
Portfolio (Tab) - Applications (Drop Down)
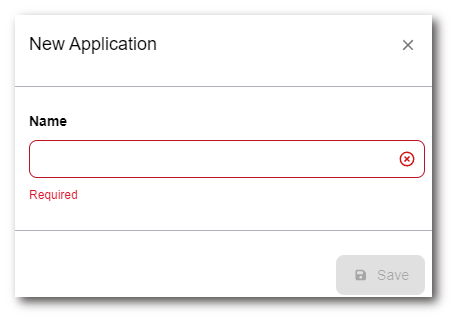
From this page, select 'New Application'. In the pop-up that appears enter the name of the application. Once confirmed, this can be saved via the 'Save' button. This will generate a new application in your Cloud Navigator instance.

Importing applications via a CSV
To import applications via a CSV you can select the 'Import Applications' button featured on the applications page. The upload must contain the application name, and - if desired - can also contain the data points (questionnaire responses) to score the application.
The import template is specific to the Survey Questions (DataPoints File) you're using in that instance of Cloud Navigator, therefore it is recommended you ensure that you have the correct template by downloading a copy using the "DOWNLOAD IMPORT FILE" button in the Import Applications modal.

Once you have entered your application information into the template, you can drag this into the pop-up and browse to the saved CSV file. This will then take you to the next page, where you can import files by selecting 'Import Applications'. You will then see applications populated in the applications screen.
You do not need to complete all of the information in the template, the minimum information is an application name, and the rest are non-mandatory.
Importing applications via a server CSV
You can create applications when loading server data into Cloud Navigator via CSV. If you enter data into the Application Name field in the CSV, any application names not already in your Cloud Navigator instance will be created at the time of the server import. This will also assign the servers listed against these applications in the upload. Please see how to create servers.
Deleting applications
In the event you want to delete an application go to the application and open its Settings in the sidebar:
Portfolio (Tab) - Applications (Drop Down) - Selected Application - Settings (Sidebar)
Scroll to the bottom of that panel and choose Delete Application, a confirmation popup will appear. At the prompt type DELETE in caps and select the 'OK' button to confirm you want to delete the application. The application will be removed.

To contact Cloud Navigator sales or support for any reason at all, simply email cloudnavigator-support.gb@softwareone.com and one of the team will get back to you. If your issue is urgent, please mark the email as URGENT in the subject line.
